
Cool and Creamy Delight: How to Make Homemade Ice Cream
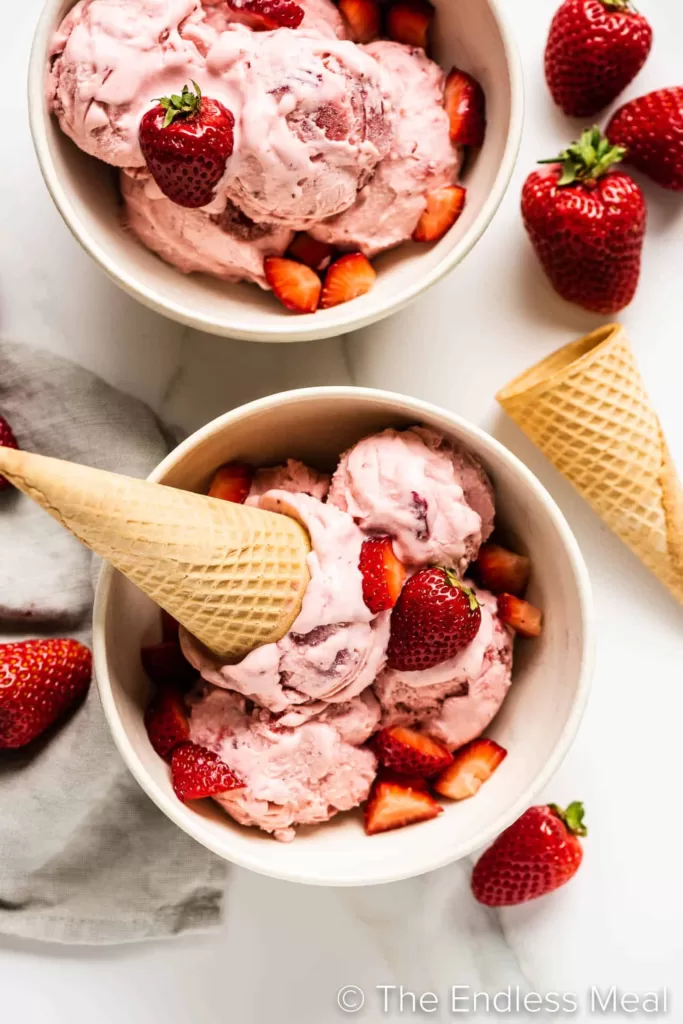
There is no doubt that ice cream is one of the most beloved and iconic desserts in the world. Whether you prefer it in a cone or a bowl, there is nothing quite like the creamy, cold goodness of a scoop of ice cream. In this post, we will take a closer look at the recipe for homemade ice cream, including the ingredients, preparation, and cooking time. Ice Cream Ingredients For the vanilla ice cream, you will need the following ingredients: For the chocolate ice cream, you will need the following ingredients: Ice Cream Preparation Ice Cream Cooking time The cooking time for homemade ice cream will depend on the specific recipe you are using and the type of ice cream maker you have. However, as a general rule, you can expect the preparation process to take around 15-20 minutes, and the churning process to take around 20-30 minutes. Once the ice cream is finished churning, it will need to be transferred to a freezer-safe container and frozen for at least 4 hours. Overall, the entire process of making homemade ice cream should take around 5-6 hours. Ice Cream Variations One of the great things about homemade ice cream is that there are endless variations that you can create. Here are a few ideas: In conclusion, making homemade ice cream is a fun and easy way to enjoy a classic and delicious dessert. With just a few simple ingredients and an ice cream maker, you can create a frozen treat that is creamy, rich, and full of flavor. Whether you prefer classic vanilla or decadent chocolate, there are endless variations that you can experiment with to create your own unique flavor. So the next time you’re in the mood for a sweet treat, give this homemade ice cream recipe a try, and you won’t be disappointed. More Dessert Recipes Follow Us on Instagram
Indulge in Decadence: How to Make Homemade Cheesecake
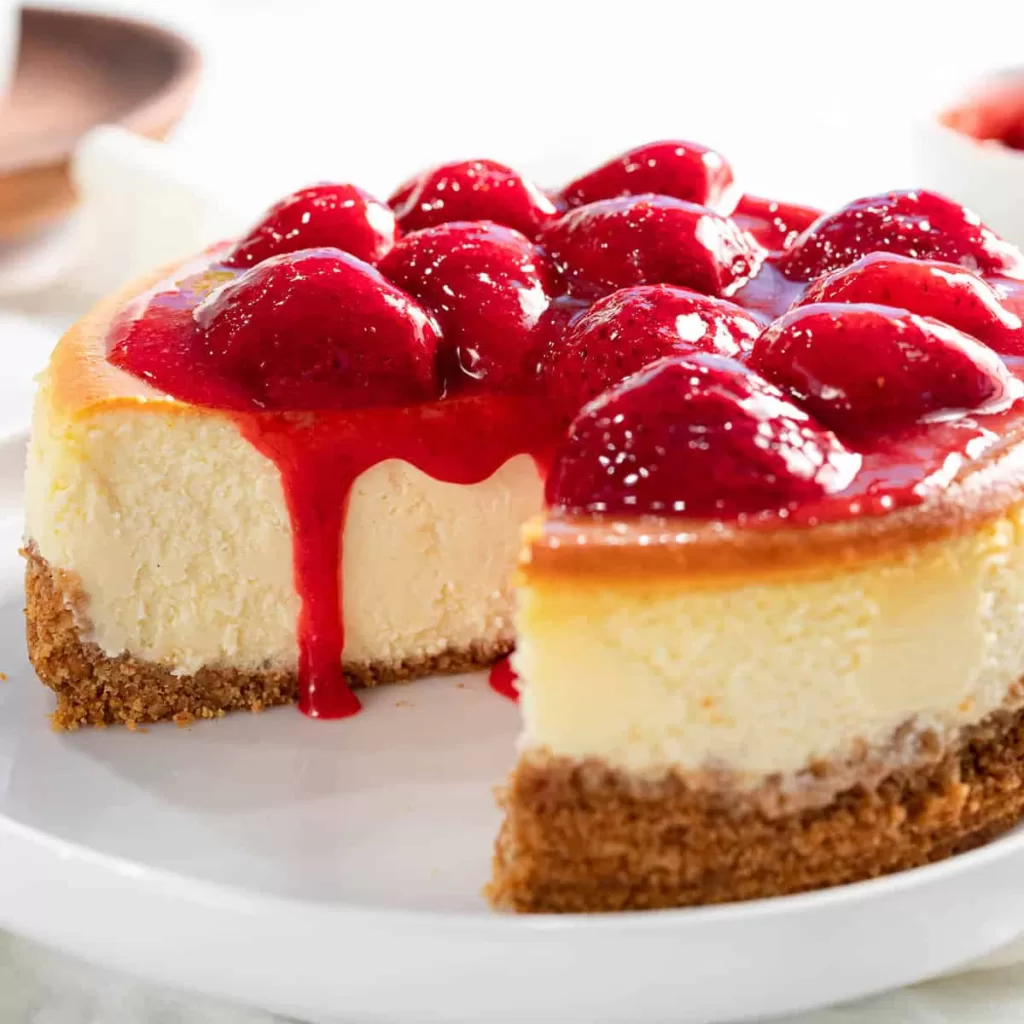
Cheesecake is a classic dessert from ancient Greece that has been enjoyed for generations. With its creamy texture and rich flavor, it is no wonder that it is such a beloved dessert. In this post, we will take a closer look at the recipe for homemade cheesecake, including the ingredients, preparation, and cooking time. Cheesecake Ingredients For the crust, you will need the following ingredients: For the cheesecake filling, you will need the following ingredients: Cheesecake Preparation Cheesecake Cooking time The cooking time for homemade cheesecake will vary depending on your oven and the size of your cheesecake. As a general rule, you can expect the preparation process to take around 20-30 minutes, and the baking process to take around 45-50 minutes. Once the cheesecake is finished baking, it will need to cool to room temperature before being refrigerated for at least 4 hours or overnight. Overall, the entire process of making homemade cheesecake should take around 6-7 hours. Cheesecake Variations One of the great things about homemade cheesecake is that there are endless variations that you can create. Here are a few ideas: In conclusion, making homemade cheesecake is a delicious and rewarding experience. With just a few simple ingredients and some patience, you can create a dessert that is sure to impress. Whether you prefer a classic cheesecake or a variation with your favorite flavorings, there are endless possibilities to experiment with. So the next time you’re in the mood for a rich and decadent dessert, give this homemade cheesecake recipe a try, and you won’t be disappointed. More Dessert Recipes Follow Us on Instagram
Indulge in Creamy Perfection: A Delicious Panna Cotta Recipe

If you’re a fan of Italian desserts, then you’ve probably heard of panna cotta. This delicious dessert is a creamy, silky smooth custard that is typically served with a fruity sauce. The great thing about panna cotta is that it’s actually quite easy to make, and with just a few ingredients, you can have a dessert that’s sure to impress your guests. So, without further ado, let’s get started with the recipe. IPanna Cotta ngredients The Panna Cotta Sauce Panna Cotta Preparation Step 1: In a medium-sized saucepan, combine the heavy cream and sugar over medium heat. Cook until the sugar has dissolved completely, stirring occasionally. Step 2: Once the sugar has dissolved, remove the saucepan from the heat and stir in the vanilla extract. Step 3: In a small bowl, combine the cold water and gelatin, and stir until the gelatin has dissolved. Step 4: Add the gelatin mixture to the cream mixture and stir until well combined. Step 5: Pour the mixture into a bowl or ramekins, and refrigerate for at least 4 hours, or until set. Step 6: While the panna cotta is setting, prepare the fruit sauce. Combine the fruit, sugar, and water in a small saucepan and bring to a boil over medium heat. Reduce the heat and simmer for 5-10 minutes, or until the fruit has softened and the mixture has thickened slightly. Step 7: Once the panna cotta has set, remove it from the refrigerator and pour the fruit sauce on top. Step 8: Serve and enjoy! Panna Cotta Cooking time The total cooking time for this recipe is about 4 hours, which includes the time it takes for the panna cotta to set in the refrigerator. However, the actual hands-on time for making the panna cotta is only about 20-30 minutes, which makes it a great option for a quick and easy dessert. Conclusion Panna cotta is a delicious and elegant dessert that is sure to impress your guests. With just a few simple ingredients and easy-to-follow steps, you can make this creamy and decadent dessert right in your own kitchen. Whether you’re serving it for a special occasion or just as a sweet treat after dinner, panna cotta is a dessert that is sure to please. More Dessert Recipes Follow Us on Instagram
How to Make Classic Tiramisu: A Step-by-Step Recipe Guide
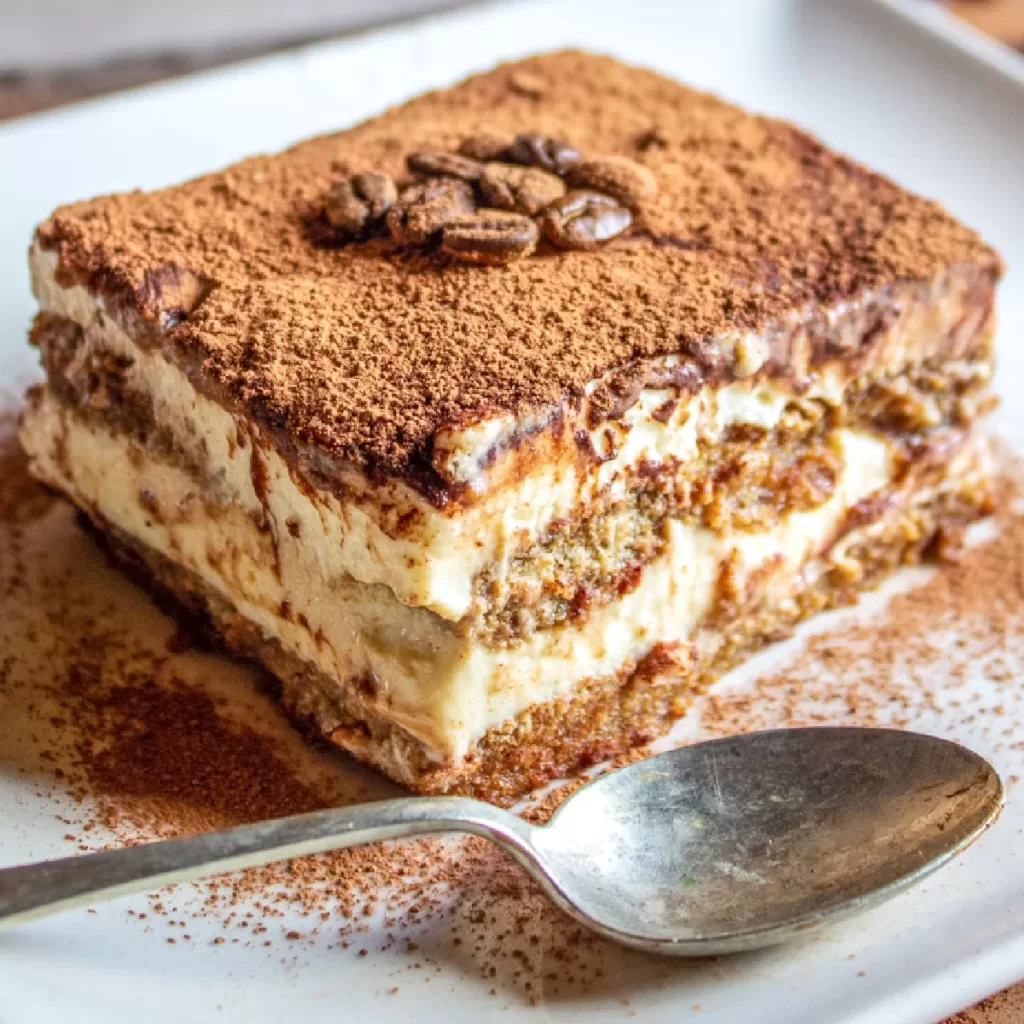
Tiramisu is a classic Italian dessert that is known and loved all around the world. This indulgent dessert is made with a combination of rich, creamy mascarpone cheese, coffee-soaked ladyfingers, and dusted with cocoa powder. Tiramisu is a perfect dessert for any occasion, from a fancy dinner party to a casual gathering with friends. In this post, we’ll take a closer look at the recipe for tiramisu, including the ingredients, preparation, and cooking time. Tiramisu Ingredients To make a delicious tiramisu, you will need the following ingredients: Tiramisu Preparation Tiramisu Cooking time The total cooking time for tiramisu can vary, depending on the individual recipe and kitchen conditions. However, the preparation process should take about 30 minutes. The tiramisu will then need to be refrigerated for at least 2 hours before it is ready to serve. The total cooking time, including the refrigeration period, should take around 3 hours. In conclusion, tiramisu is a delicious and indulgent dessert that is perfect for any occasion. While the recipe may seem complex, it is actually quite simple and easy to make. With just a few ingredients and a bit of patience, you can create a mouthwatering tiramisu that is sure to impress your friends and family. Whether you’re a seasoned baker or a beginner in the kitchen, give this classic Italian dessert a try and you won’t be disappointed. More Dessert Recipes Follow Us on Instagram
Healthy and Delicious Sweet Potato and Black Bean Enchiladas Recipe: A Perfect Vegetarian Meal
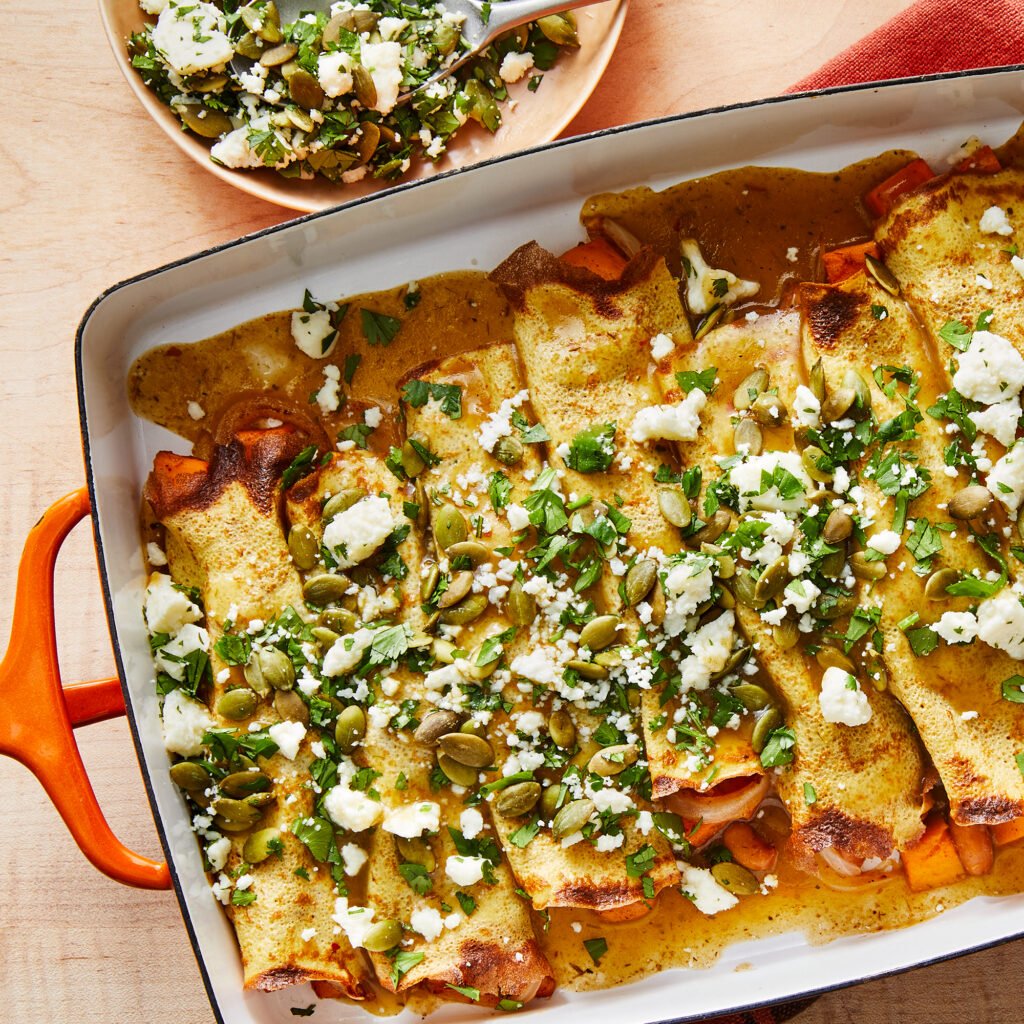
Sweet potato and black bean enchiladas are a delicious and healthy meal that is perfect for any occasion. Packed with flavor and nutrients, these enchiladas are a great way to enjoy a comforting and satisfying meal that is also good for you. In this blog post, we’ll explore the history of this dish, the benefits of the ingredients, and provide a step-by-step recipe to make your own sweet potato and black bean enchiladas. History of Sweet Potato and Black Bean Enchiladas Enchiladas Are a traditional Mexican dish that dates back to the Mayan civilization. The word enchilada means “in chile” in Spanish, and it refers to a dish made with tortillas that are stuffed with various ingredients and then smothered in a chili sauce. Sweet potato and black bean enchiladas are a modern twist on this classic dish, and they have become a popular vegetarian and vegan option in many Mexican restaurants. Benefits of Sweet Potatoes and Black Beans Sweet potatoes are a great source of dietary fiber, vitamin A, vitamin C, and potassium. They are also a good source of complex carbohydrates, which provide long-lasting energy and help to stabilize blood sugar levels. Black beans are an excellent source of plant-based protein and are also high in dietary fiber, iron, and folate. They are also low in fat and have been linked to a reduced risk of heart disease. Recipe for Sweet Potato and Black Bean Enchiladas Sweet Potato and Black Bean Enchiladas Ingredients Sweet Potato and Black Bean Enchiladas Instructions Cooking time for sweet potato and black bean enchiladas Approximately 45 minutes, and the recipe serves 4-6 people. This recipe can also be made ahead of time and stored in the refrigerator or freezer for later. To reheat, simply cover with aluminum foil and bake in the oven until warmed through. In conclusion, sweet potato and black bean enchiladas are a delicious and healthy meal. More Veggie Recipes Follow Us on Instagram
Nutritious and Delicious Butternut Squash Soup Recipe: A Comforting Autumn Dish

Butternut squash soup is a delicious and nutritious dish that is perfect for cool autumn days. This creamy and comforting soup is easy to make and is a great way to incorporate a variety of healthy vegetables into your diet. In this blog post, we will discuss the health benefits of butternut squash and provide a step-by-step guide to making a delicious butternut squash soup, with an emphasis on using passive voice in the writing. Health Benefits of Butternut Squash Butternut squash is a nutrient-dense vegetable that is rich in vitamins and minerals, including vitamins A, C, and E, as well as potassium, magnesium, and fiber. This bright orange vegetable is also a good source of beta-carotene, which is a powerful antioxidant that helps to protect cells from damage caused by free radicals. Regular consumption of butternut squash has been linked to a range of health benefits, including improved heart health, stronger bones, and a reduced risk of chronic diseases such as diabetes and cancer. Recipe for Butternut Squash Soup Butternut Squash Soup Ingredients: Butternut Squash Soup Instructions and preparation Cooking time for butternut squash soup Approximately 30-40 minutes, with additional time required for cooling and reheating. The recipe serves 6-8 people, making it an excellent option for a healthy and satisfying meal. This recipe can also be easily modified to suit individual tastes, with additional spices or herbs added to enhance the flavor. In conclusion, butternut squash soup is a delicious and nutritious dish that is easy to make and perfect for cooler weather. With its high vitamin and mineral content, as well as powerful antioxidants, butternut squash is an excellent choice for anyone looking to maintain a healthy diet. Try this recipe and enjoy the many benefits of butternut squash, all while indulging in a delicious and comforting soup. More USA Recipes Follow Us on Instagram
Discover the Delicious Recipe and History of Buffalo Wings

Buffalo wings are a popular appetizer that originated in the United States. These wings are made with chicken that has been deep-fried and then coated in a spicy sauce. The dish is usually served with a side of blue cheese dressing and celery sticks. In this blog post, we will delve into the history of buffalo wings, discuss the recipe and cooking time, and provide tips for making delicious wings. The origins of buffalo wings can be traced back to the Anchor Bar in Buffalo, New York. In 1964, Teressa Bellissimo, the co-owner of the Anchor Bar, came up with the idea of frying chicken wings and tossing them in a spicy sauce. The sauce was made with hot sauce, butter, and other seasonings, and the dish quickly became a local favorite. The popularity of buffalo wings spread across the country and is now a staple of American cuisine. To make buffalo wings, you will need the following ingredients The first step in making buffalo wings is to preheat your oven to 400 degrees Fahrenheit. Next, mix together the flour, paprika, cayenne pepper, salt, and black pepper in a bowl. Dredge the chicken wings in the flour mixture, shaking off any excess. Place the chicken wings on a baking sheet and bake for 30 minutes, flipping the wings halfway through. While the wings are baking, melt the butter in a saucepan over low heat. Add the hot sauce and white vinegar to the butter and stir until the ingredients are combined. Once the wings are done baking, remove them from the oven and place them in a large bowl. Pour the sauce over the wings and toss until the wings are coated evenly. Serve the wings with a side of blue cheese dressing and celery sticks. The cooking time for buffalo wings can vary depending on your oven and the size of the wings. A good rule of thumb is to bake the wings for 30 minutes at 400 degrees Fahrenheit, flipping them halfway through. The sauce can be adjusted to your taste by adding more or less hot sauce. Here are a few tips for making delicious buffalo wings In conclusion, buffalo wings are a delicious and spicy appetizer that has become a staple of American cuisine. By following our recipe and tips, you can make restaurant-quality wings in your own kitchen. The key is to use fresh chicken wings, dredge them in the flour mixture, and bake them until they are crispy. And don’t forget to toss them in a spicy sauce for that authentic buffalo wing taste. Enjoy! More USA Recipes Follow Us on Instagram
The Perfect Bowl of Clam Chowder: A Recipe and Cooking Guide

Clam chowder is a hearty and delicious soup that is popular in the northeastern United States. This dish has a long history and is often associated with New England cuisine. In this blog post, we will explore the origins of clam chowder, provide a recipe and cooking time, and offer some tips for making the perfect bowl of chowder. The history of clam chowder can be traced back to the 18th century when it was a popular dish among sailors and fishermen in the northeastern United States. The dish was made with ingredients that were readily available on ships, including salt pork, onions, potatoes, and of course, clams. Over time, the dish became popular among the general population and has since become a staple of New England cuisine. To make clam chowder, you will need the following ingredients The first step in making clam chowder is to cook the bacon in a large pot over medium heat until it is crisp. Remove the bacon from the pot and set it aside, leaving the bacon fat in the pot. Add the onion, celery, and garlic to the pot and cook until the vegetables are tender. Sprinkle the flour over the vegetables and stir until the flour is incorporated. Pour in the chicken broth and heavy cream and stir until the mixture is smooth. Add the potatoes and clams to the pot and bring the mixture to a simmer. Cook for 20-25 minutes, or until the potatoes are tender. Season with salt and pepper to taste. To serve, ladle the chowder into bowls and garnish with the reserved bacon and chopped parsley. The cooking time for clam chowder is approximately 30-35 minutes, depending on how quickly the potatoes cook. The key is to cook the chowder over low heat, so the ingredients have time to meld together and the flavors develop. Here are a few tips for making the perfect bowl of clam chowder In conclusion, clam chowder is a classic dish that has been enjoyed for centuries. By following our recipe and tips, you can make a delicious bowl of chowder in your own kitchen. The key is to use fresh ingredients, cook the chowder over low heat, and garnish with fresh parsley for a burst of flavor. Enjoy! More USA Recipes Follow Us on Instagram
Crispy Air Fryer Chicken Wings: A Delicious and Healthy Snack

When it comes to comfort food, few dishes are more satisfying than a plate of crispy chicken wings. However, traditional deep-fried wings are notoriously unhealthy, loaded with calories, fat, and cholesterol. Luckily, there’s a healthier and equally delicious alternative: crispy air fryer chicken wings. In this blog post, we’ll explore the recipe and cooking time for these mouth-watering wings and the benefits of using an air fryer. Air Fryer Chicken Wings Recipe To make crispy air fryer chicken wings, you’ll need a few simple ingredients Crispy Air Fryer Chicken Wings Directions & Preparation Crispy Air Fryer Chicken Wings Cooking Time One of the benefits of using an air fryer to make chicken wings is the reduced cooking time. While traditional deep-fried wings can take up to 15-20 minutes to cook, air fryer wings can be ready in just 25-30 minutes. This is because air fryers use hot air to circulate around the food, cooking it from all sides and producing a crispy exterior without the need for excessive oil or prolonged cooking times. Benefits of Using an Air Fryer In addition to reducing cooking time, air fryers offer several other benefits for health-conscious home cooks: Conclusion Crispy air fryer chicken wings are a delicious and healthy alternative to traditional deep-fried wings. With a simple recipe and reduced cooking time, air fryer wings are an excellent snack or appetizer for any occasion. So next time you’re craving a plate of crispy chicken wings, try making them in an air fryer for a healthier and equally satisfying snack More Air Fryer Recipes Follow Us on Instagram
Crispy Air Fryer Salmon: A Healthy and Flavorful Dish

Salmon is a healthy and delicious protein that is packed with omega-3 fatty acids, vitamins, and minerals. While there are many ways to cook salmon, using an air fryer is a simple and tasty method that produces a crispy and flavorful dish. In this blog post, we’ll explore the recipe and cooking time for crispy air fryer salmon and the benefits of this cooking method. Air Fryer Salmon Recipe To make crispy air fryer salmon, you’ll need a few simple ingredients Crispy Air Fryer Salmon Directions & Preparations Crispy Air Fryer Salmon Cooking Time One of the benefits of using an air fryer to make salmon is the reduced cooking time. While traditional oven-baked salmon can take up to 20-25 minutes to cook, air fryer salmon can be ready in just 8-12 minutes. This is because air fryers use hot air to circulate around the food, cooking it from all sides and producing a crispy exterior without the need for prolonged cooking times. Benefits of Using an Air Fryer In addition to reducing cooking time, air fryers offer several other benefits for health-conscious home cooks: Conclusion Crispy air fryer salmon is a healthy and flavorful dish that is easy to make using an air fryer. With a simple recipe and reduced cooking time, air fryer salmon is an excellent option for a quick and healthy meal. So next time you’re looking for a tasty and nutritious protein, try making crispy air fryer salmon and enjoy the many benefits of using an air fryer. More Air Fryer Recipes Follow Us on Instagram