
Sweeten Up Your Day with a Delicious Cherry Pie: A Recipe Guide for Cherry Pie dessert

When it comes to classic American desserts, few things are more iconic than a warm, homemade cherry pie. With its flaky crust and sweet, tangy filling, it’s a treat that has been enjoyed for generations. And the best part is, with the right ingredients and recipe, it’s actually quite simple to make at home. In this blog post, we’ll explore the ins and outs of cherry pie, including the ingredients you’ll need, the step-by-step preparation process, and tips for making the perfect pie every time. So grab your rolling pin and let’s get started! To make a classic cherry pie, you’ll need the following ingredients Cherry Pie Preparation Cherry Pie Cooking time The total cooking time for a cherry pie is approximately 45-50 minutes, with an additional 30 minutes of cooling time before serving. Tips: Conclusion: Cherry pie is a classic American dessert that is sure to satisfy your sweet tooth. With its flaky crust and sweet, tangy filling, it’s the perfect treat for any occasion. And with this simple recipe, you’ll be able to make your very own cherry pie right at home. So why not give it a try and see for yourself just how delicious this dessert can be! 20th February the National Cherry Pie Day It’s the perfect time to indulge in a slice of this classic dessert. Cherry pie is a timeless American favorite that has been enjoyed for generations. The combination of tart cherries and a flaky crust is simply irresistible, and it’s no wonder why cherry pie is such a beloved dessert. Whether you prefer it served warm with a scoop of vanilla ice cream or cold from the refrigerator, there’s no denying the deliciousness of this treat. So why not celebrate National Cherry Pie Day by baking your own homemade version? With the right ingredients and a bit of patience, you can create a cherry pie that’s just as good (if not better) than what you’d find at a bakery. More Dessert Recipes Follow Us on Instagram
Discover the Delicious Recipe and History of Buffalo Wings

Buffalo wings are a popular appetizer that originated in the United States. These wings are made with chicken that has been deep-fried and then coated in a spicy sauce. The dish is usually served with a side of blue cheese dressing and celery sticks. In this blog post, we will delve into the history of buffalo wings, discuss the recipe and cooking time, and provide tips for making delicious wings. The origins of buffalo wings can be traced back to the Anchor Bar in Buffalo, New York. In 1964, Teressa Bellissimo, the co-owner of the Anchor Bar, came up with the idea of frying chicken wings and tossing them in a spicy sauce. The sauce was made with hot sauce, butter, and other seasonings, and the dish quickly became a local favorite. The popularity of buffalo wings spread across the country and is now a staple of American cuisine. To make buffalo wings, you will need the following ingredients The first step in making buffalo wings is to preheat your oven to 400 degrees Fahrenheit. Next, mix together the flour, paprika, cayenne pepper, salt, and black pepper in a bowl. Dredge the chicken wings in the flour mixture, shaking off any excess. Place the chicken wings on a baking sheet and bake for 30 minutes, flipping the wings halfway through. While the wings are baking, melt the butter in a saucepan over low heat. Add the hot sauce and white vinegar to the butter and stir until the ingredients are combined. Once the wings are done baking, remove them from the oven and place them in a large bowl. Pour the sauce over the wings and toss until the wings are coated evenly. Serve the wings with a side of blue cheese dressing and celery sticks. The cooking time for buffalo wings can vary depending on your oven and the size of the wings. A good rule of thumb is to bake the wings for 30 minutes at 400 degrees Fahrenheit, flipping them halfway through. The sauce can be adjusted to your taste by adding more or less hot sauce. Here are a few tips for making delicious buffalo wings In conclusion, buffalo wings are a delicious and spicy appetizer that has become a staple of American cuisine. By following our recipe and tips, you can make restaurant-quality wings in your own kitchen. The key is to use fresh chicken wings, dredge them in the flour mixture, and bake them until they are crispy. And don’t forget to toss them in a spicy sauce for that authentic buffalo wing taste. Enjoy! More USA Recipes Follow Us on Instagram
The Perfect Bowl of Clam Chowder: A Recipe and Cooking Guide

Clam chowder is a hearty and delicious soup that is popular in the northeastern United States. This dish has a long history and is often associated with New England cuisine. In this blog post, we will explore the origins of clam chowder, provide a recipe and cooking time, and offer some tips for making the perfect bowl of chowder. The history of clam chowder can be traced back to the 18th century when it was a popular dish among sailors and fishermen in the northeastern United States. The dish was made with ingredients that were readily available on ships, including salt pork, onions, potatoes, and of course, clams. Over time, the dish became popular among the general population and has since become a staple of New England cuisine. To make clam chowder, you will need the following ingredients The first step in making clam chowder is to cook the bacon in a large pot over medium heat until it is crisp. Remove the bacon from the pot and set it aside, leaving the bacon fat in the pot. Add the onion, celery, and garlic to the pot and cook until the vegetables are tender. Sprinkle the flour over the vegetables and stir until the flour is incorporated. Pour in the chicken broth and heavy cream and stir until the mixture is smooth. Add the potatoes and clams to the pot and bring the mixture to a simmer. Cook for 20-25 minutes, or until the potatoes are tender. Season with salt and pepper to taste. To serve, ladle the chowder into bowls and garnish with the reserved bacon and chopped parsley. The cooking time for clam chowder is approximately 30-35 minutes, depending on how quickly the potatoes cook. The key is to cook the chowder over low heat, so the ingredients have time to meld together and the flavors develop. Here are a few tips for making the perfect bowl of clam chowder In conclusion, clam chowder is a classic dish that has been enjoyed for centuries. By following our recipe and tips, you can make a delicious bowl of chowder in your own kitchen. The key is to use fresh ingredients, cook the chowder over low heat, and garnish with fresh parsley for a burst of flavor. Enjoy! More USA Recipes Follow Us on Instagram
The Comforting History and Delicious Recipe of Mac and Cheese

Mac and cheese is a classic comfort food that is beloved by people of all ages. It is a simple dish that consists of macaroni pasta and a creamy cheese sauce, but its history and popularity in the United States are anything but ordinary. In this blog post, we will explore the origins of mac and cheese, discuss its ingredients and preparation instructions, and provide you with a cooking time that will result in a perfect and delicious dish. The history of mac and cheese dates back to the 14th century when a similar dish was prepared in Italy. This dish, called maccheroni alla mugnaia, consisted of long strands of pasta that were boiled and served with grated cheese. Over time, variations of this dish spread throughout Europe and eventually made their way to the Americas. In the United States, mac and cheese became popular during the colonial period, where it was often served as a side dish for special occasions. It wasn’t until the 1930s, however, that the boxed version of mac and cheese was introduced. This convenience food quickly became a household staple and remains a popular dish to this day. To make mac and cheese from scratch, you will need the following ingredients The first step in making mac and cheese is to cook the macaroni according to the package instructions. While the macaroni is cooking, melt the butter in a saucepan over medium heat. Once the butter has melted, add the flour and whisk until smooth. Gradually add the milk to the mixture, whisking constantly until the sauce thickens. Next, add the shredded cheddar cheese to the sauce and stir until the cheese is melted and the sauce is smooth. Season the sauce with salt and pepper to taste. Drain the cooked macaroni and add it to the cheese sauce, stirring until the pasta is coated evenly. Mac & Cheese Cooking Time Transfer the mac and cheese to a baking dish and bake in a preheated 350-degree oven for 25 to 30 minutes or until the top is golden brown and crispy. Let the mac and cheese cool for a few minutes before serving. Mac and cheese is a simple and delicious dish that can be made with just a few ingredients. It is perfect for a quick weeknight dinner or for a special occasion. The cooking time may vary depending on your oven and the size of your baking dish, but a good rule of thumb is to bake the mac and cheese for 25 to 30 minutes. In conclusion, mac and cheese has a rich history that dates back centuries, and it remains a beloved dish in the United States. By following our easy-to-follow recipe, you can make this classic comfort food in your own kitchen. The key is to use quality ingredients, and to bake the dish until the top is golden brown and crispy. Give it a try and enjoy this delicious and comforting dish! More American Recipes
Discover the Rich History and Delicious Recipe of Apple Pie
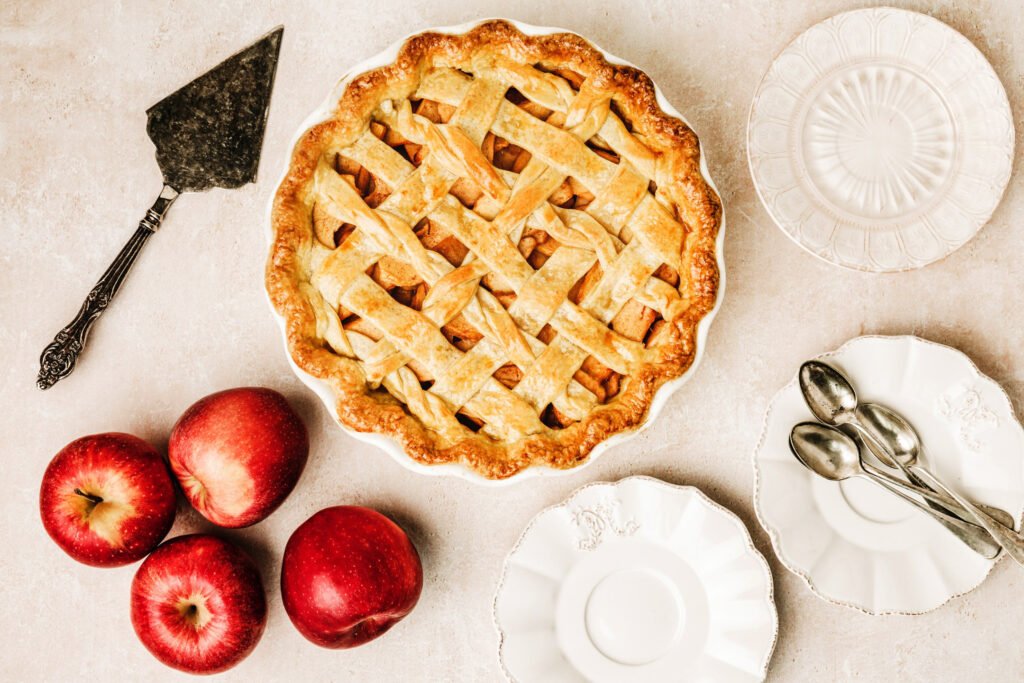
Apple pie is a quintessential American dessert that has been enjoyed for centuries. This sweet and comforting dish is a staple at holidays and special occasions, and its rich history and delicious taste make it a beloved favorite. In this blog post, we will explore the origins of apple pie, discuss its ingredients and preparation instructions, and provide you with a cooking time that will result in a perfect and scrumptious pie. The history of apple pie dates back to medieval times when pies were filled with various meats and fruits. Apple pies were not popular in Europe until the 16th century when the fruit was introduced from England to the continent. Apple pie quickly became popular in England, and by the 17th century, it had made its way to the American colonies. To make apple pie from scratch, you will need the following ingredients The first step in making apple pie is to preheat your oven to 375 degrees Fahrenheit. Next, mix together the sugar, brown sugar, flour, cinnamon, nutmeg, and salt in a large bowl. Add the sliced apples to the bowl and toss until the apples are coated evenly with the sugar mixture. Roll out half of the pie dough and fit it into a 9-inch pie dish. Spoon the apple mixture into the pie crust and dot the top with butter. Roll out the second half of the pie dough and place it over the top of the apple filling. Cut slits into the top of the dough to allow steam to escape during baking. Apple Pie Cooking Time Bake the apple pie for 45 to 50 minutes, or until the crust is golden brown and the filling is bubbling. Remove the pie from the oven and let it cool for a few minutes before serving. Apple pie is a classic and beloved dessert that can be made with just a few simple ingredients. The key to a delicious pie is using quality apples and the right blend of spices. The cooking time may vary depending on your oven, but a good rule of thumb is to bake the pie for 45 to 50 minutes. In conclusion, apple pie is a delicious dessert with a rich history that spans centuries. By following our easy-to-follow recipe, you can make this classic treat in your own kitchen. The key is to use quality ingredients, and to bake the pie until the crust is golden brown and the filling is bubbling. Give it a try and savor the taste of warm, cinnamon-spiced apples in a buttery crust. More American Recipes
Barbecue Ribs Recipe

Barbecue Ribs: A Delightful Dish for All Occasions Barbecue ribs are a classic American dish that have been enjoyed for generations. They are a staple of summer barbecues and cookouts, but can also be made indoors and enjoyed year-round. Barbecue ribs are the perfect dish for special occasions, such as birthdays, holidays, and family gatherings, or for a simple weeknight dinner. What are Barbecue Ribs? Barbecue ribs are cuts of pork that are slow-cooked with a dry rub or sauce, resulting in tender, juicy meat that falls off the bone. They are typically prepared by smoking the ribs over low heat for several hours, until they are fully cooked and infused with the flavors of the rub or sauce. There are several types of ribs to choose from, including baby back ribs, spareribs, and St. Louis-style ribs. Why are Barbecue Ribs so Popular? One reason barbecue ribs are so popular is because of their versatility. They can be made with a variety of rubs, sauces, and marinades, allowing for endless flavor possibilities. Additionally, barbecue ribs are a crowd-pleaser and are sure to be a hit at any gathering. They are also easy to prepare, as they only require minimal prep work and can be cooked in a slow cooker or on a grill. The Secret to Perfect Barbecue Ribs The secret to perfect barbecue ribs is to cook them low and slow. This allows the meat to become tender and infused with the flavors of the rub or sauce. Another important factor is the type of wood used for smoking. Hickory, mesquite, and applewood are popular choices for their distinct flavors and aromas. Finally, it is important to allow the ribs to rest for a few minutes before serving, as this allows the juices to redistribute and enhances the flavor. Barbecue Ribs Recipe Here is a simple recipe for making delicious barbecue ribs in your oven or on the grill: Barbecue Ribs Ingredients Barbecue Ribs Instructions Cooking Time for Barbecue Ribs The cooking time for barbecue ribs will vary depending on the method used, as well as the size and thickness of the ribs. Generally, oven-baked ribs will take 2 1/2 to 3 hours to cook, while grill-cooked ribs will take 2 1/2 to 3 hours.